Shop Talk: Painting Materials
Update 3/25/20: Here is a link to an Amazon ideas page that I made. This list is for watercolor beginner and people who would like to pick up watercolor as a casual hobby. Enjoy!!
When I was in college, I took a watercolor painting class taught by a professional watercolor artist. He gave us a list of materials we’d need for the class, and once I got to the art supply store, I was sticker-shocked at how much everything cost. Being the broke college student that I was, I emailed my professor to ask whether there were other brands or materials that were still acceptable and easier on my wallet. He replied, “Yes, however, you should know that using good materials will significantly impact how you learn.” I went back to the store (Shout out to Blick Art Materials in Midtown!) and spoke to a shop assistant who happened to also be a watercolor artist. She suggested that as a beginner, I should spend my money on good, quality paper and paint. Brushes, trays, etc., have a wide range of prices, but won’t severely impact the quality of the watercolor experience.

One of the first pieces I made in my college watercolor class (2014)

Three of my pieces on display in college (2014)
Watercolor supplies is a subject which many people bring up when I share my painting process online, especially on Instagram. As a response, I’ve put together a guide/list of materials that I used in college, for beginners; and materials that I use today, for those more seasoned. Seeing as watercolor painting is a major part of my profession these days, I’ve upgraded most of my materials to professional grade, but there are some materials that I’ve continued to use since my college days.
*I should note that this post is not sponsored, and I don’t make any money if you buy/click on the links in this post. I just put these together because many of my Instagram followers have asked for a post similar to this…and I’m all for helping people discover the wonderful world of watercolor!
Paper
BEST QUALITY: ARCHES WATERCOLOR PAPER
GOOD QUALITY: Strathmore Watercolor Paper
As it turns out, having good and the right paper really does make a difference. To me, good watercolor paper is one which absorbs water and holds the color well, and does not bleed (I’ve had experience with cheaper watercolor paper that actually bled through). Watercolor paper which meets my not-bleeding quality is typically handmade, with its fibers running in all directions in layers, making the structure of the paper strong. Good watercolor paper is also 100% cotton and acid-free, which means that overtime, the paper will stay its current color and will not turn yellow.
When it comes to watercolor paper, there are three different kinds: Hot-Pressed, Cold-Pressed, and Rough. Hot-pressed paper has a smooth surface, which makes it dry quicker compared to the other two kinds. This is ideal if you’re doing quick, smaller, one-layer washes of colors. Cold-pressed paper has a non-smooth, slightly textured surface. Cold-pressed paper is more commonly found in art supply stores on shelves, as they are the most commonly used. They can withstand a few layers of washes, as they do not dry as quickly as hot-pressed paper. Rough watercolor paper has a heavy, dare I say, rough, surface. They hold pools of water quite well, and they create grains in color as the washes dry. Due to its texture, it can be challenging to control brush strokes on rough paper.

Thanks to Blick for this image!
If you are a beginner, I suggest beginning with hot-pressed paper and graduating to cold-pressed, then rough. These days, I keep all three stocked in my studio, but I find myself using more cold-pressed and rough paper, and rarely the hot-pressed. I like the texture and grain that these two kinds give; they translate well as I scan them and put them on our products, as many of our prints are printed on textured paper.
pencil, ink, and eraser


Pencil: Papermate Yellow Barrel Mechanical Pencil
Pencil: Pentel Graphgear 500 Automatic Drafting Pencil with HB Lead
Pen: Micron Ink Fine Line Pens
Eraser: Pentel Clic Eraser
Eraser: Staedler Plastic Eraser
Eraser: Faber-Castell Eraser Pencil (Perfection 7056)
For pencil and ink, I don’t think that brands make much of a difference in the result. My experience with pencils have been based on my drafting experience. I started learning hand-drafting when I was 13 (almost 14 - I started school early!). When I first learned to draft, I started with lead holders, and as I advanced, I moved on to the Pentel Graphgear. I love the tiny points that allows for great detailing. Another pencil that is an all time favorite for me (that I keep all over the place and purchase in bulk) is the yellow Papermate mechanical pencils with the pink erasers. They write so smoothly and the eraser is easily one of the best erasers! And speaking of erasers, the three listed are in constant rotations when I’m sketching, especially when I work on detailed paintings (usually the ones which involve buildings or homes)
For sketching, I like to use H or HB lead/graphite. Below is a gradient example that I found on the internet, which shows the lightness or darkness of certain graphite grades. I find that H and HB lead is visually legible, yet light enough to easily erase once you ink your lines.

Gradient example - found on the internet
In terms of pens, I have tried many and shortlisted three of my all-time favorites: The Pilot Precise V5 or V7 (great for everyday use, and for drafting/sketching), the Pilot Razor Point Pen (also great for everyday use, especially for note taking because it dries quickly), and the Micron Ink Fine Pen. The last pen, the Micron Ink Fine Pen, is the one I swear by for inking prior to watercoloring and inking on watercolor. It’s waterproof, so it won’t smear or bleed (assuming you allow it to properly dry). For inking, I typically use the .01 thickness and sometimes up to .03.
Paint

Best Quality: Winsor and Newton Professional Watercolor
Good Quality: Winsor and Newton Cotman Watercolor
Winsor and Newton is my favorite brand when it comes to watercolor paint. Now, I will say that Winsor and Newton watercolor paints are not cheap but they are great quality (simply put, you get what you pay for). It’s also worth mentioning that when it comes to watercolor, a little bit goes a long way. Leftover paint can be left to harden, and when you want to reuse it, all you need to do is add water.
The two most common forms of watercolor are tubes and pans. I prefer tubes over pans, simply because I have a hard time keeping pans clean. Tubes allow me to make mixes of colors easily, control consistencies of washes, and once they dry in the tray wells, they can still be re-used as pans can. The main difference between the Cotman watercolor grade versus Professional grade, to me, is the vibrancy of colors. I find that professional grade colors are “truer”, whereas I think Cotman colors are a little less saturated. To this day, I use a little bit of both colors, depending on what I’m painting and what colors I need.

don’t compromise on paint!
I absolutely love my Winsor and Newton watercolor paint. While I regularly use tubes, I do have a smaller pack of watercolor pans that I use when I travel.
I’ve put together a list of my “most frequently used” colors that I highly recommend you purchase when you’d like to start painting. Most of these are Cotman grade colors, and will create a great “starter pack”. The list is below the photo below:
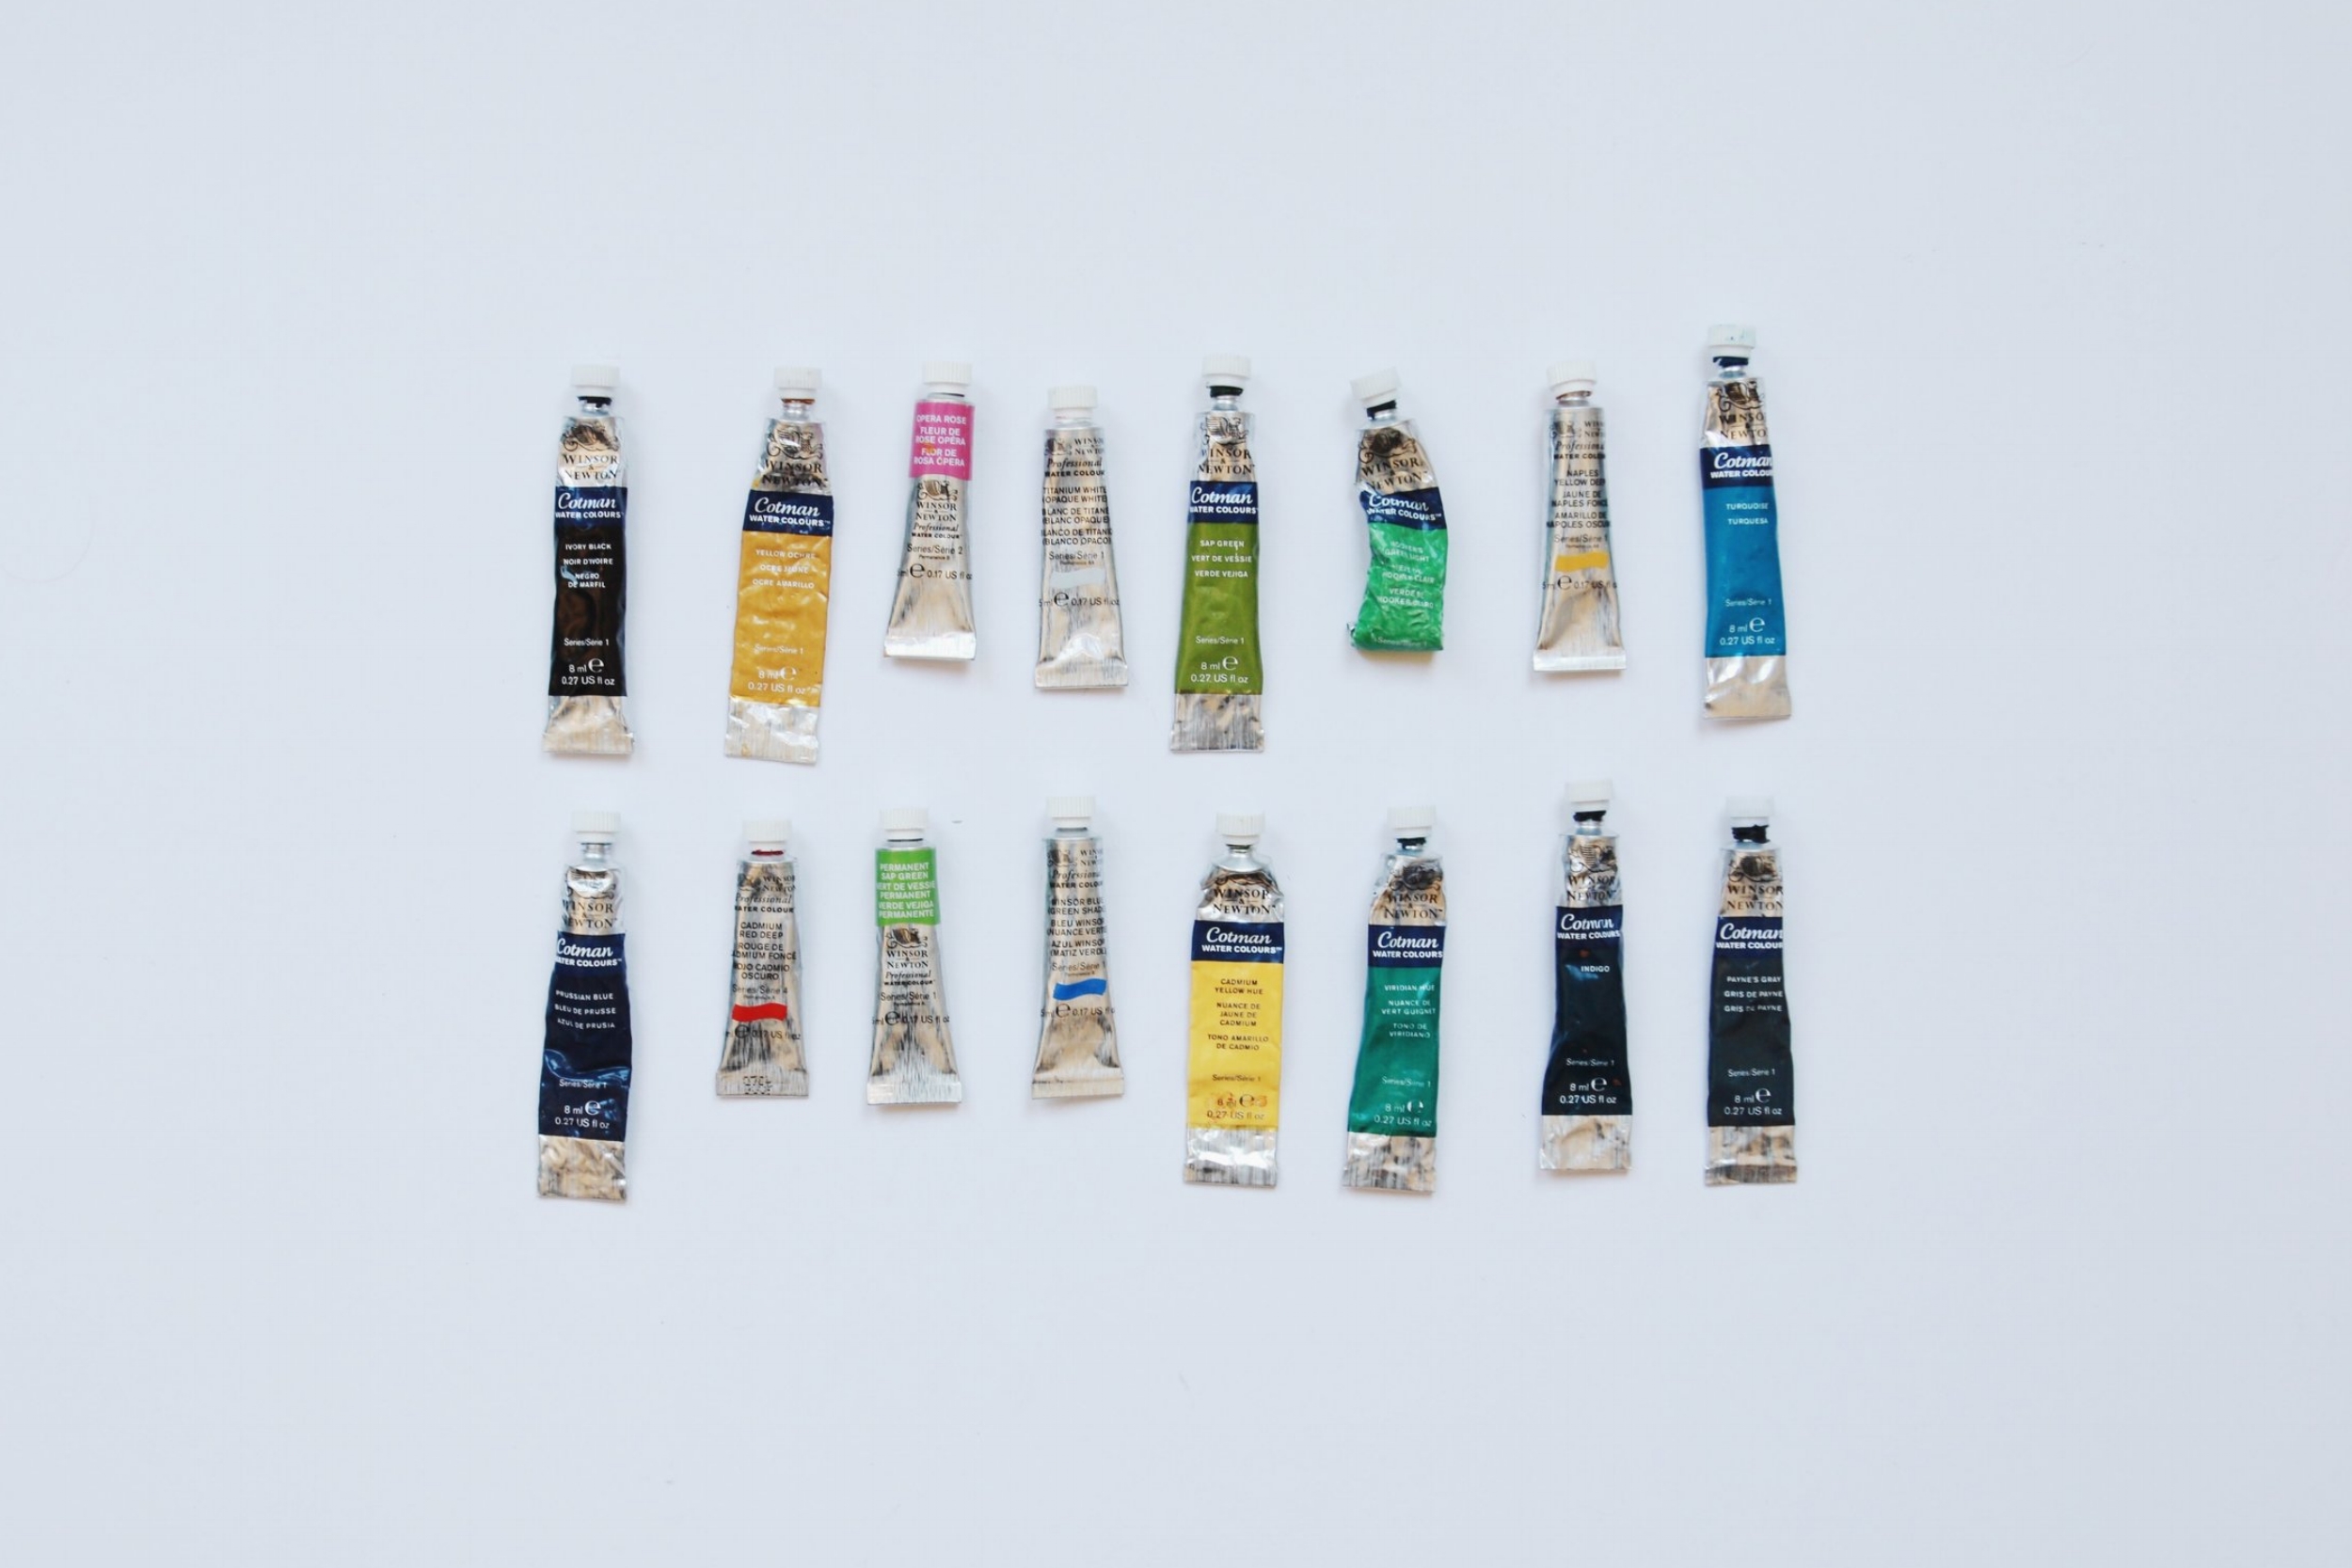
Top Left to Right:
(Cotman) Ivory Black
(Cotman) Yellow Ochre
(Professional) Opera Rose
(Professional) Titanium White
(Cotman) Sap Green
(Cotman) Hooker’s Green Light
(Professional) Naples Yellow Deep
(Cotman) Turquoise
Bottom Left to Right:
(Cotman) Prussian Blue
(Professional) Cadmium Red Deep
(Professional) Sap Green Permanent
(Professional) Winsor Blue
(Cotman) Cadmium Yellow
(Cotman) Viridian Hue
(Cotman) Indigo
(Cotman) Payne’s Gray
Brushes

Best Quality: Princeton Synthetic Sable Brushes
Good Quality: Princeton Velvetouch Brushes
Princeton brushes are by far, my favorite brushes to use. In college, I started out with store brand brushes, then graduated to Princeton brushes. My favorite is the synthetic sable brushes, because the tips don’t bend easily and the bristles tend to stick together for longer.
When it comes to brushes, I keep a big collection of round brushes of various sizes. I prefer round brushes over fan or flat brushes. I find that round brushes have the most versatile use, and are great brushes for beginners. To maintain your brushes in good shape, always dry gently with facial tissue, and lay them flat. Do not put them in cases which will cause the tips/brush hairs to bend - once they bend, it is difficult to get them back into the proper shape.
Miscellaneous
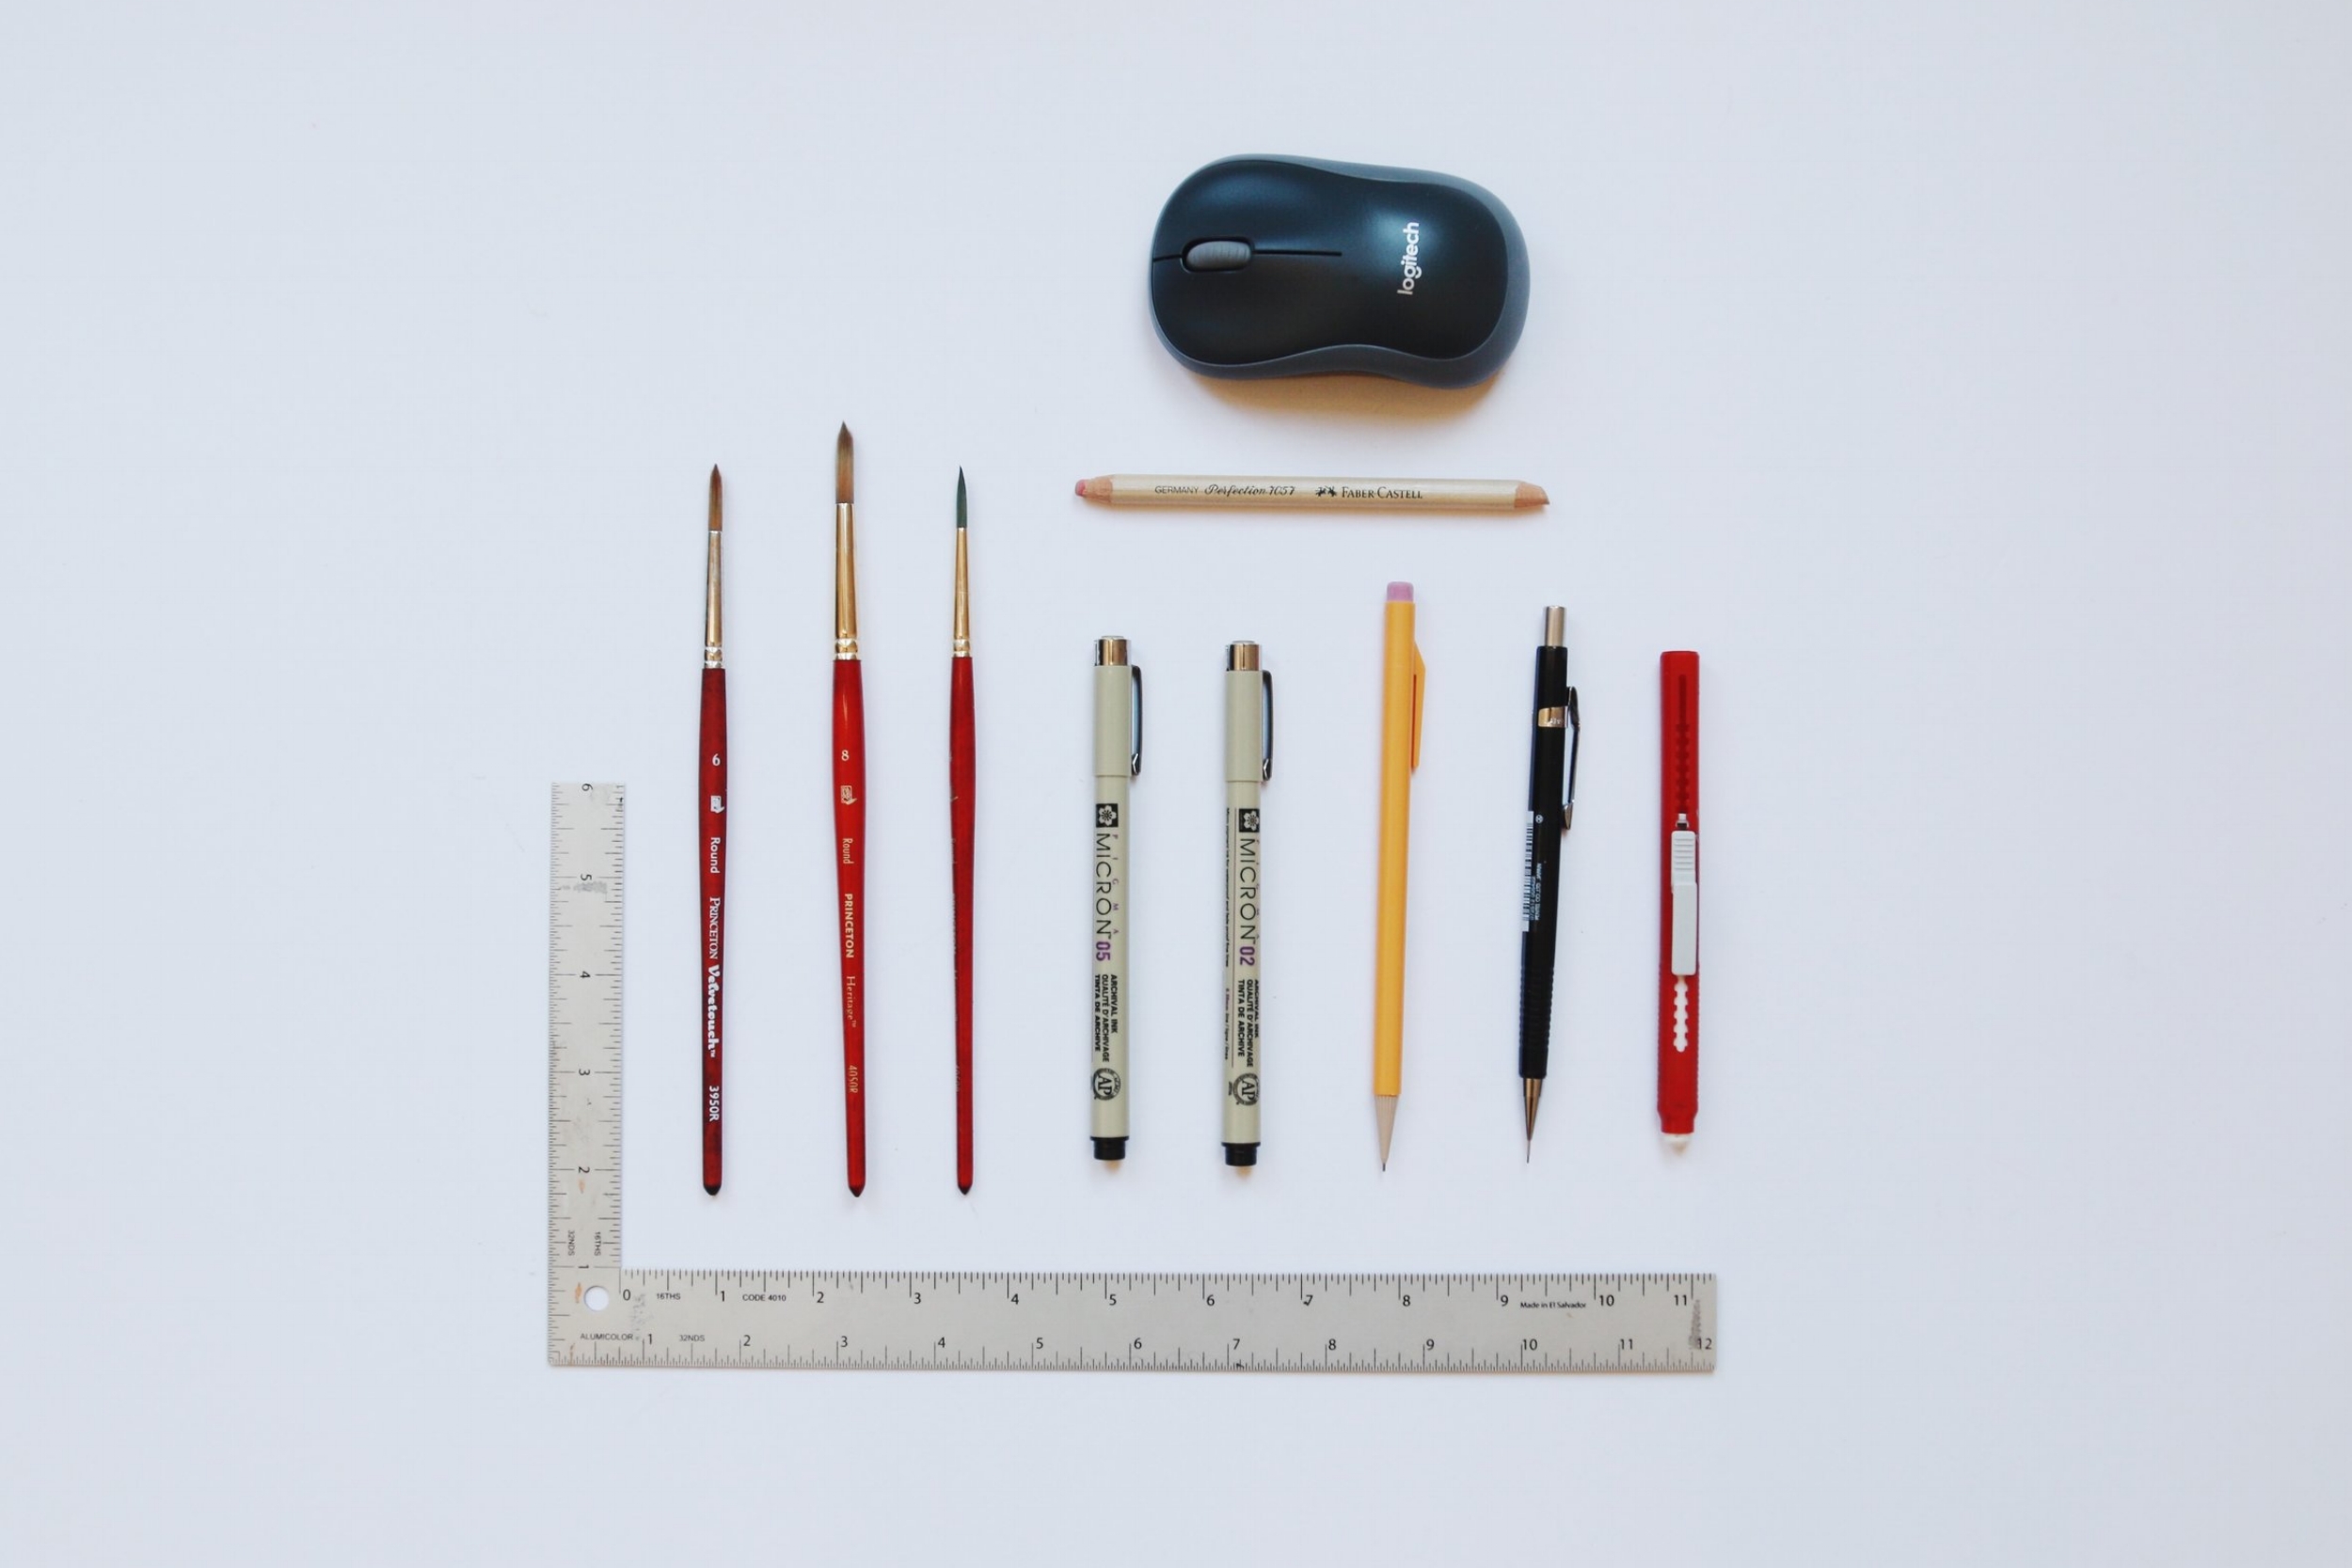
Gang’s all here! My usual tools for painting/illustrating.
Straight Edge: Alumicolor L-Squares
Paint Tray: Richeson Trays
facial Tissues (such as kleenex)
The above list are other materials that I use when I paint. The L-square helps me keep things in frame and on straight lines. When it comes to paint trays, I like having deep wells and a larger flat tray where I can make mixes of colors and different wash consistencies. And to keep my brushes clean, I use soft tissues to dry them before storing them. Having tissues nearby is also great for blotting colors off your brush when you want to change colors.
I hope that you find great use from this list! The world of watercolor painting has been, and continues to be so wonderful to me and I hope you find enjoyment in it too. Let me know in the comments below if you have any products that you’d recommend!